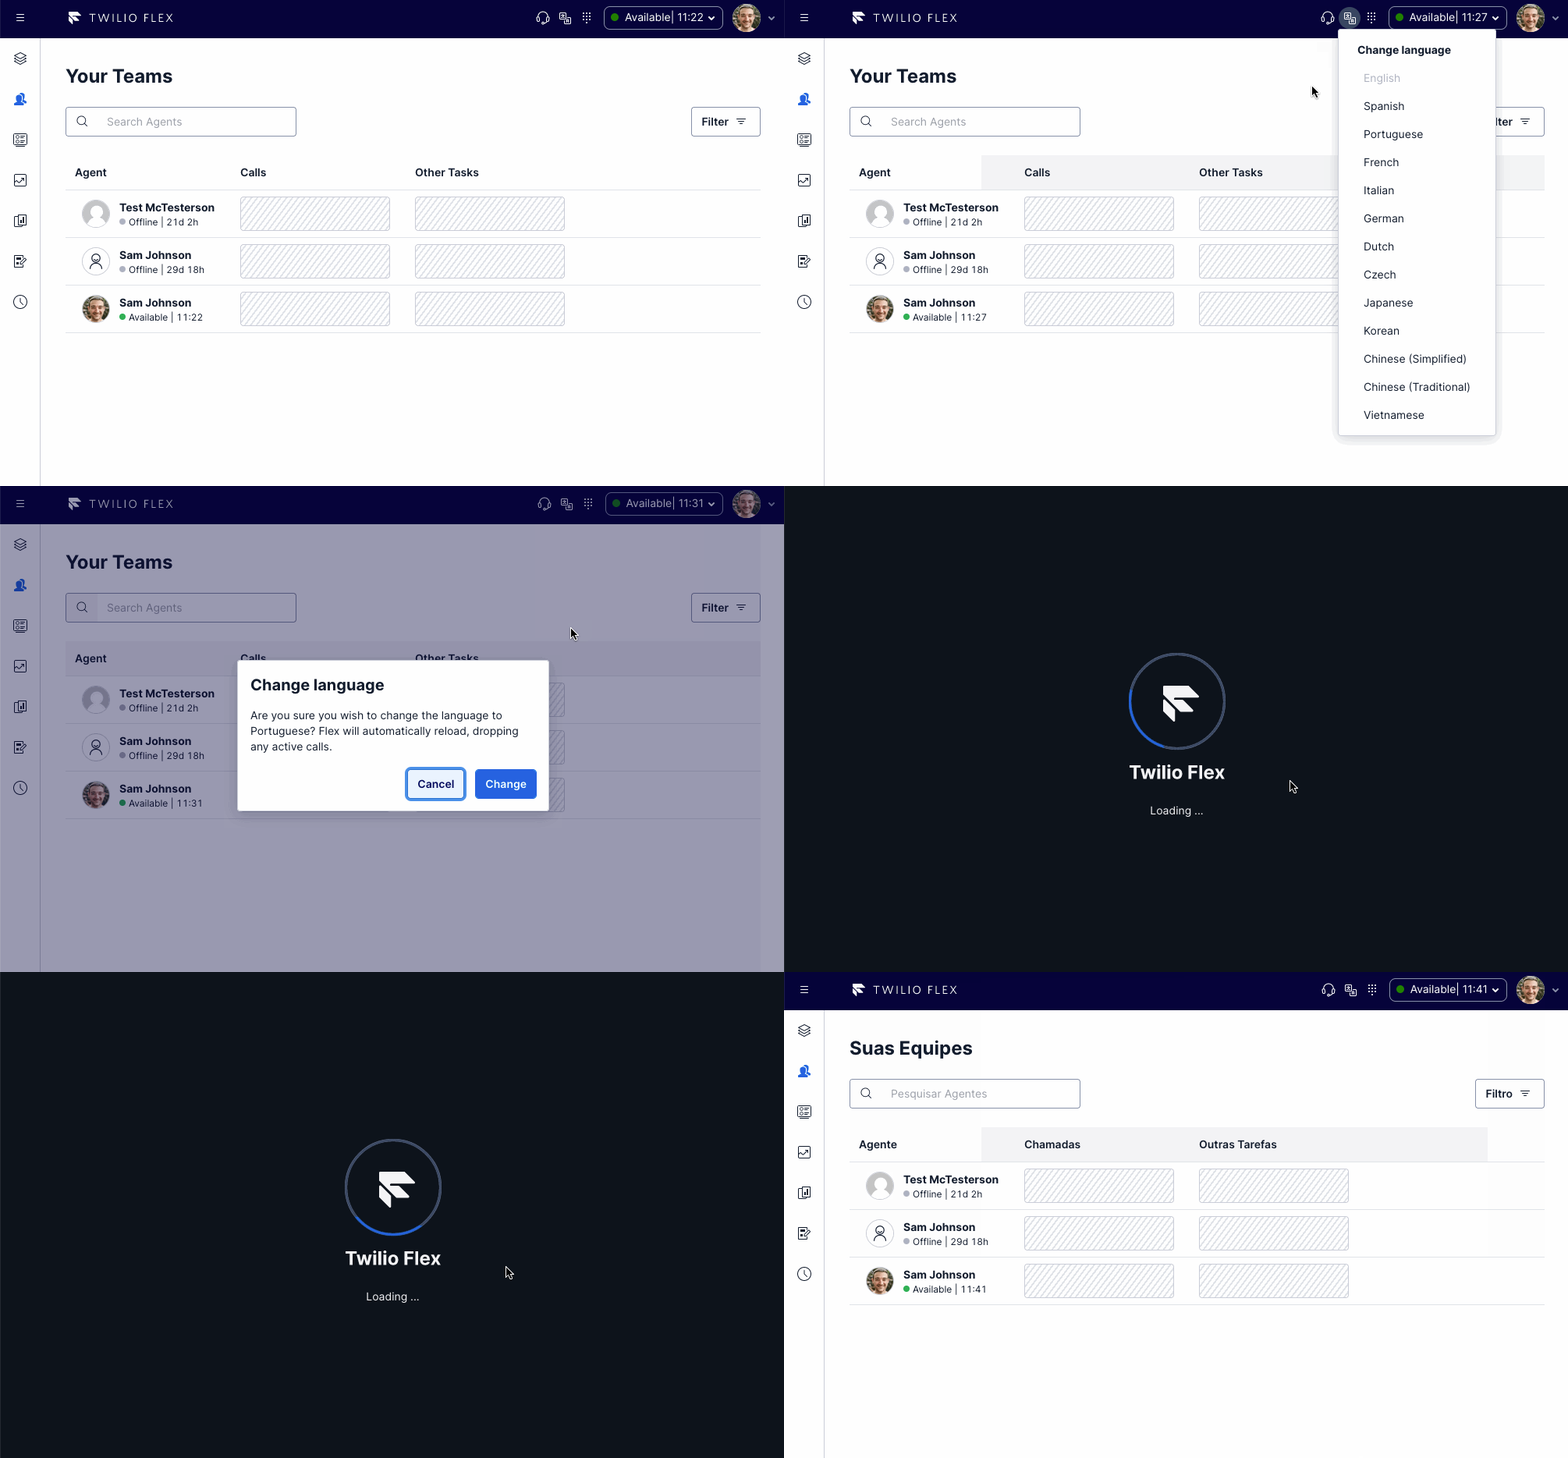
localization
A new native localization feature is available in Flex UI 2.10 and later. To use the native feature, navigate to Flex > Admin > Features > Beta, and enable the toggle for "Enable language selection". It will then be available after reloading Flex. The native feature has limited languages available, so the template feature remains available with support for additional languages, however both features cannot be enabled simultaneously.
Feature summary
This feature provides a language selection dropdown in the Flex UI header, as well as several translations for built-in Flex UI strings. You may also extend this feature to support additional languages as needed.
Flex User Experience

Setup and dependencies
To enable the localization feature, under your flex-config attributes set the localization enabled flag to true:
"localization": {
    "enabled": true,
    "show_menu": true
}
If you would like to disable the ability for users to set their own language, set show_menu to false. Even if the menu is disabled, the language may be set by administrators via one of the following methods:
- Per-worker via SSO or API, by setting the
languageworker attribute - Globally via the
languagetop-levelflex-configattribute
How does it work?
This feature replaces the Flex UI strings by appending new strings of the same name to the manager.strings object. The language used is determined via a combination of factors:
- If the global
languageattribute inflex-configis set todefault(which it is by default), and there is no language set on the worker, then the browser language is used if possible. - If the global
languageattribute inflex-configis set to a specific language, and there is no language set on the worker, that language is used if supported. - If a language is set on the worker, it is used regardless of the global or browser settings.
- As a default fallback,
en-USis used.
Languages are defined in the languages directory of the feature. Each language is contained within a JSON file that lists all of the translated system strings for that language. The index.ts file contains an array of languages, mapping the JSON translations to a display name and key value. To add a new language, add its corresponding JSON file, then add it to the array in index.ts.
Adding new translations
To add a new translation, you will need to translate strings for both Flex UI and the template features you are using.
Flex UI strings
To provide translated Flex UI strings, first retrieve the full list of English strings from Flex UI:
- Open Flex UI with all plugins disabled
- In your browser's developer console, run the following command to copy the strings to your clipboard:
copy(Twilio.Flex.Manager.getInstance().strings) - Paste the strings in a new, empty JSON file.
Now that you have a JSON representation of the Flex UI strings, provide them to your translator. Note that some strings include template placeholders and HTML, neither of which should be translated.
Once you have the translated JSON file, place it into the feature-library/localization/languages directory, preferably named for the locale that it represents (for example, en-gb.json). Then, open the index.ts file in that directory and make the following changes:
- Import your newly translated JSON file
- Update the exported array with the definition for your new language.
After making these changes, the language will appear in the localization menu and is ready to use. However, template features are not yet localized, only Flex UI. Follow the steps in the next section to translate feature strings.
Feature strings
Each feature in the template is responsible for its own translations. These are implemented within the feature's strings hook. Within each feature's strings hook, you may add versions of each string for each locale you wish to support. See How to build on the template for more details.